A traffic cone is the paper clip or rubber band of the traffic safety industry. It is a simple product with an abundance of uses and applications. Commonly used on the roads to direct traffic or mark hazards. They are also used indoors to block off entrances or keep people out of areas under construction. Cones are used to direct crowds of people at events, as temporary sign stands, or they can be used during exercise drills and during driver license exams. The list goes on, and as people have discovered new uses for them, they have also developed some accessories to further legitimize their significance.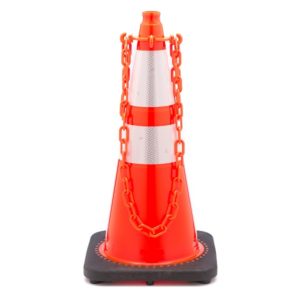
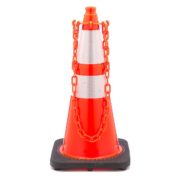
The Traffic Cone Chain Connector can be placed over the top of each cone, allowing for plastic chains to create a quick and cheap barrier. This application is ideal for parking lots and crowd control.
The Retractable Cone Topper can be mounted on taller cones to create a barrier most commonly used to direct lines of people. The reflectivity of cones and this accessory make them ideal for situations that call for high visibility.
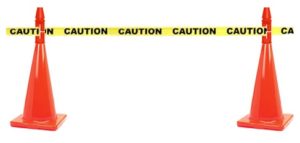
T-CAPs are a great way to support caution tape, rather than using random objects and items. The control assist product allows users to slip the tape in a slit that is mounted over the cone, making it easy to use caution tape safely and effectively.

Retractable Cone Bars is a popular accessory that connects two cones with PVC piping, creating a quick and highly visible barrier for construction, pedestrian walkways or parking lots. These bars can be used with most traffic cones and stretch from 4 to 7 ft.
Traffic Cone Signs turn any cone into a light-weight sign that is easy to see and move. The signs slip into the top of the cone and lock into place.
Cone Brackets for Barricade Lights are an easy way to make use of any extra barricade lights. The product easily fits over the top of the cone, allowing for simple mounting.
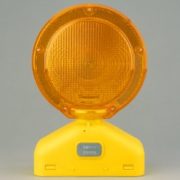
If you’re looking for an actual light, the UniLamp is a practical solution. The 360 degree computer designed high clarity poly-carbonate lens comes in amber or red, and also slips easily over the top of your cones.
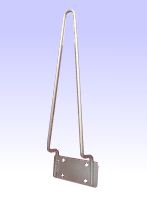 Popular among utility workers, Truck Cone Holders are used to firmly stack cones in place without having to worry about moving around the vehicle. Simply bolt it onto your truck and stack away!
Traffic Cone Carts are another way to easily transport your cones within shorter distances.
Finally, Traffic Cone Weights can be used to help stabilize cones in high speed or windy areas. They are made from 100% recycled rubber and easily slip over the cone, resting on the base.
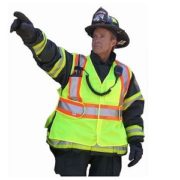
The most important factor in determining the best safety vest is the circumstance in which it is worn. In instances when workers are dealing with traffic safety, they are required to wear safety apparel to allow drivers to see them easier and from farther away. The Federal Highway Administration states that:
“All workers within the right-of-way of a Federal-aid highway who are exposed either to traffic (vehicles using the highway for purposes of travel) or to construction equipment within the work area shall wear high-visibility safety apparel.” (Worker Visibility, 23 CFR Part 634).
Additionally, flaggers and workers within range of vehicular traffic of any sort are required to wear safety apparel. There are a number of different classes of vests and apparel that adhere to the specifications at the job site, though state regulations should also be checked as additional requirements may exist.
Class 1 safety vests and apparel are best for low speed situations that are not directly on or next to the road. They must have a minimum of 155 square inches of reflective tape around the middle of the body and over the shoulders. You may see workers in a residential area or in a parking lot with Class 1 vests.
Class 2 safety vests and apparel have at least 201 square inches of reflective tape around the body and over the shoulders, as they are used in higher speed areas than Class 1. They are often worn by police officers, airport runway workers, during utility operations or by workers that have a physical barrier between them and the traffic. They are typically worn during daytime work, while Class 3 is more preferable for work done at night.
Class 3 safety vests and apparel are used in high risk situations, where traffic is heavy and/or sight distance is low. If the speed limit exceeds 50 MPH, or workers are in bad weather, situations with low visibility, or high-crash locations, Class 3 vests are required. They are also used by ambulance responders, construction workers, flaggers, or anyone working directly on the roadway. The vests must have at least 310 square inches of reflective tape.
Class E safety apparel does not refer to the upper body like Classes 1, 2 or 3, but rather the lower body in the form of waistband trousers or shorts. Class E bottoms worn with a Class 2 or 3 top is regarded as a Class 3 Ensemble.
The regulated vests and apparel must be in either orange or yellow, allowing drivers to see them both at day and at night. Some include additional features like LEDs or a number of pockets. Unregulated vests and apparel, or Non-ANSI apparel, are available in other colors. Other safety apparel besides vests include a large variety of: high visibility shirts, sweatshirts, jackets and pants, safety coveralls, flame resistant clothing, safety rain gear and safety hats, backpacks and shoe coverings. High-visibility clothing labeled with their respective class do meet specifications, while clothing without a class label should not be assumed as fit for any particular roadside work.
Knowing which barricade to use can be a bit tricky, as there are quite a few variables to sort through. First let’s look at the different options and their applications:
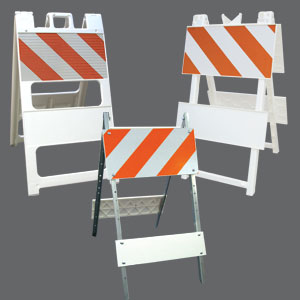
Type I Barricade: Has reflective sheeting on the upper half of the barricade, and not the lower. They are ideal for pedestrian traffic and other types of control where maximum reflective sheeting is not needed. Since reflective sheeting can be the most expensive part of the barricades, Type I barricades tend to have a lower price.
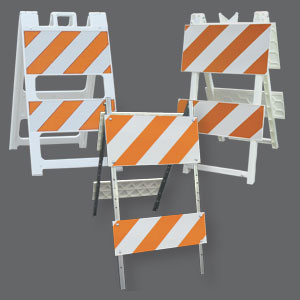
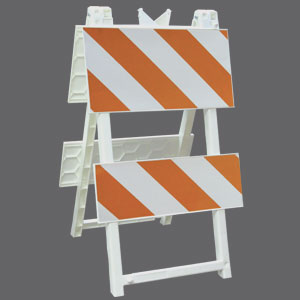
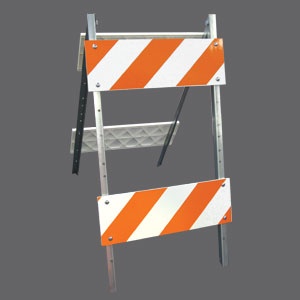
Type II Barricade: Has reflective sheeting on the upper and lower boards of the barricade. They are most often used on roads that have detours or closings, as well as other types of control that require maximum reflective sheeting. Type II’s are smaller than Type III’s, making them ideal in situations with limited space.
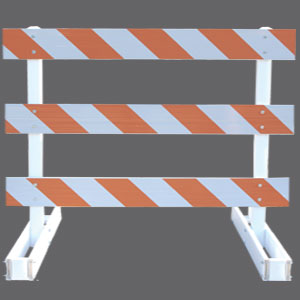
Type III Barricade: Has three reflective boards, all with sheeting. They are able to block entire lanes of traffic, making them ideal for road closers or detours. Although they may be tricky to store due to their size, there are collapsible options available with 4’,6’,8’ and 10’ boards.
Other types of products used for traffic and crowd control are: A-Frame Barricades, Concrete Barriers, Safety Barricades, Steel Barricades and Water Filled Barricades. Make sure to fully understand the proper application before purchasing and using each product.
 When choosing between barricades, you generally have two options with the make: plastic barricades or steel legs with plastic boards.
Plastic Barricades: Economical, strong and stack-able. The legs and board are molded into one piece, it never rusts or needs painting, and the legs never need straightening.
Steel Legs: Boards can be replaced and legs can be repaired. Steel is strong and dense, wont warp.
Depending on your state codes, particular sheeting may be required on your barricades.
Engineering Grade (EG): The least effective sheeting, used in less serious situations. It has the lowest shelf life and can be difficult to remove once applied with adhesives.
High Intensity Prismatic (HIP): More reflective and effective than EG, often times used on standard road signs as well as traffic safety devices. It is reflective during the day and at night, and protects against scratches and other forms of tear. Although HIP sheeting is not as effective as Diamond Grade, the difference in price is appealing.
Diamond Grade (DG): The most reflective sheeting, required in many states for most applications. It can be seen from greater distances and is superior to its alternatives in every category besides price. Still, when it comes to traffic and pedestrian safety, price becomes of less importance.
Orange and white stripes are used in almost every circumstance, however red and white stripes may be used at the dead end of roads or where permanent closings are marked.
Our barricades are sheeted to have both right and left facing sheeting on opposite sides.
Right Barricade: placed on the right side of the road, as traffic passes to its left. The orange and white sheeting should be sloping downwards from right to left.
Left Barricade: placed on the left side of the road, as traffic passes to its right. The orange and white sheeting should be slopping downwards from left to right.
Breaking ground for construction, farming, or any other reason requires ensuring you’re not damaging any existing infrastructure. Taking that extra step can prevent serious damage below ground that can sometimes be irreversible or unfixable. You are also putting yourself and others at risk without fully understanding the underground landscape and the implications of digging into it. The first step you must take before breaking ground is to call your local “One Call” shop where you can get all the information you need on the underground systems already in place.
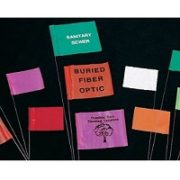
Before beginning any excavation, it is required that the area is properly marked above ground. Those markings are usually in the form of small colored utility flags or posts, with paint, chalk, tape or even wax lines made between the markings. Generally, flags mark larger systems like multiple ducts or large pipes and posts mark smaller pipes and cables. Still, make sure to check your local code to ensure proper usage.
In an attempt to better educate the public, the government funded American Public Works Association (APWA) has shared a color code for utility markings on their website.
The color code reads as follows:
“WHITE – Proposed Excavation
PINK – Temporary Survey Markings
RED – Electric Power Lines, Cables, Conduit and Lighting Cables
YELLOW – Gas, Oil, Steam, Petroleum or Gaseous Materials
ORANGE – Communication, Alarm or Signal Lines, Cables or Conduit
BLUE – Potable Water
PURPLE – Reclaimed Water, Irrigation and Slurry Lines
GREEN – Sewers and Drain Lines”
Finally, correctly marking an area is as important as understanding the markings, and it never hurts to double check. If you do come across an unmarked structure, it is important to fully understand it before continuing your project. Take the extra time to reach out and use the resources at your disposal to ensure that you’ve covered every precaution.
Barricade lights are important equipment additions when it comes to increasing worker and driver safety. Barricade lights can be added to devices like barricades, barriers, drums, cones and panels, to ensure that product visibility and awareness is high. In poorly lit or hard to see areas, a barricade light can increase the life of your device, and make sure that its purpose is fulfilled. Some states require certain products to be used with a light. If you aren’t using barricade lights already, then you may want to consider finding the right type for you by understanding the following:
Every state has their own regulatory traffic code, and within it are the minimum standards that must be met. If your state outlines the need for lighting on particular traffic safety devices, then it will likely outline the minimum requirements that the light has to meet. If your state does not outline any need for lights, consider the importance and impact they serve.
As a consumer you have four different types of barricade lights to choose from. Lights can vary by intensity, visibility and application. It is critical to match the right light with the reason for their presence.
Type A lights are low-intensity and flashing from both sides. They are used to mark hazards and closures; warning traffic rather than guiding it. Type A lights can be seen at night, but are not permitted for use during the day.
Type B lights are high intensity and flashing from one side. They usually have a back and hood that allow all of the light to be angled in one direction. The applications are similar to Type A, however Type B lights mean that they can be seen during the day. This means that they are usually, although not always, LEDs.
Type C lights do not flash, but burn steadily. They are used to alert drivers of the traffic devices rather than to warn them of the hazards beyond the devices. Type C lights can be seen guiding traffic through poorly lit construction zones. Some lights have the option to flash or burn, making them Type A/C or Type B/C, depending on their intensity.
Type D lights have 360 degrees of visibility, so that users do not have to worry about aligning each light. Type D lights many be flashing or steady burn, with many having the option for both.
Like ceiling lights, barricade light bulbs can either be incandescent or LED. The difference is that LED’s use far less power to produce the same light that incandescent bulbs do, or produce far more light using the same amount of power. Therefore LED’s will last longer and are capable of producing more light; not to mention less waste is better for the environment. LEDs are more expensive per unit, however the shelf life of an LED compared to an incandescent light typically makes them cheaper overtime.
A third option for powering your barricade lights is solar. Some lights come with solar powered panels that completely recharge a battery, and some with solar assist, trickle charging the batteries and prolonging their life. Like LED’s, the solar powered units are more expensive, but the extra power can cut down costs overtime.
When it comes to batteries, it varies from manufacturer to manufacturer. Most lights are battery powered by lantern batteries or cell batteries. Some are powered by Nimh batteries, alkaline batteries, lithium-ion batteries or rechargeable batteries.
Typical traffic devices use the amber colored lights, however there are many uses for red, blue and other colored lights. Red and blue lights can be found at airports or near railroads, and typically have more intensity than an amber light does.
At the end of the day, there is no price on safety, and we want to make sure we get the best use of our traffic safety devices. Adding a barricade light to enhance the visibility of your device, or to warn drivers of the hazards beyond them, can make the difference that an unlighted device won’t. With the appropriate light attached to your device, we can guide ourselves into a safer future.
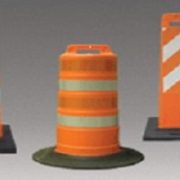
Channelizers are traffic safety products used to alert and direct traffic through roadwork or away from hazardous areas. They are often the orange plastic molded products that you see lined with reflective sheeting. Plastic channelizers are weighed down by a rubber base, varying in shape, size and function. Different channelizers are often used state to state, based on specific regulations. Additionally, all channelizing products are required to meet the guidelines of the Federal Highway Administration.
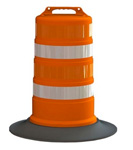
In the event of roadwork being done in a high-speed area, you will usually see channelizer drums between the worksite and motorist activity. The size of these drums allows for the largest amount of reflective sheeting, making them easily visible to drivers maneuvering through the area. The flexibility of the drums allows them to easily snap back into shape when they take on any damage.
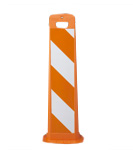
Vertical panels are used in a similar manner as barrels, but are seen more often when traffic is divided, when there is limited room, or when state guidelines specifically call for them. They have become increasingly popular as an alternative to the larger channelizing drums since they are cheaper and easier to transport and store.
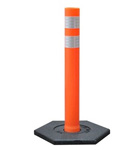
Delineators are another type of channelizer used to guide vehicles through roadwork or hazardous areas. The tall slim design of delineators allows them to be effectively used between lanes of guided traffic, and easily stored.
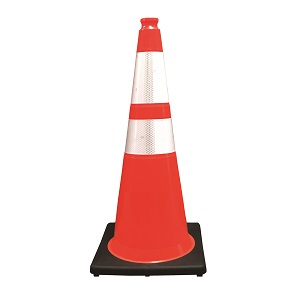
Cones are more often used to channelize traffic in slower moving areas, or alongside smaller roadside projects. Generally cones come available in three sizes: 18 inches high, 28 inches or 36 inches and may sometimes include a handle at the top that makes placing and removing them from the roadway easy.
The Difference Between Channelizers, Barriers and Barricades
While channelizers are used to direct traffic, barriers and barricades are used more to restrict it. Barriers are large, heavy, wall-like structures that are used to physically protect workers from traffic.
The purpose of barricades is not to directly protect workers, but to alert drivers. On the road, Type I and Type II barricades are used in work zones while Type III barricades mark closings.
Although the types and uses of channelizers differs slightly between states, they all serve to alert traffic and protect drivers and workers.
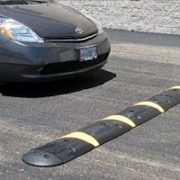
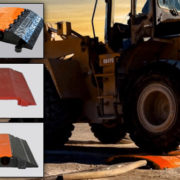
Rubber speed bumps may be regarded as superior to asphalt for a number of reasons: they’re easy to install and remove, they’re less damaging, and they’re cheaper. Although installing a rubber speed bump can be fairly easy, it’s important to do correctly to ensure it stays in place and lasts.
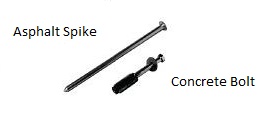
The first step is to make sure that you have all pieces and tools readily available for the installation. Different products have different specifications, so make sure that you have tools that will allow you to follow their specific guidelines. Besides the actual speed bump, your product may have come with either spikes (recommended for asphalt) or bolts and shields (recommended for concrete). Additionally, you will need a drill and hammer for installation.
Upon gathering the proper tools, follow these steps:
Note that it is recommended to remove rubber speed bumps before winter to prevent snow plows from destroying the product. Leave at least a few inches between speed bumps to allow for draining and possible expansion. Most rubber speed bumps are not designed for speeds exceeding 15 MPH.
 Bollard is not a familiar term for a lot of people. Everyone has seen them but might not have known what they were called. Of late, bollards have been in the news more as world events have put more focus on pedestrian safety. Articles in USA Today and the New York times have cited the difference bollards made in saving lives earlier this year in Time Square. In public areas where cars and pedestrians are in close proximity, steel and concrete bollards are often seen to separate cars from entering areas where pedestrians are. In the Times Square incident, the bollards had been added just the year before and their presence stopped a car that was headed the wrong way down a way one way street from doing even more damage then it might have.
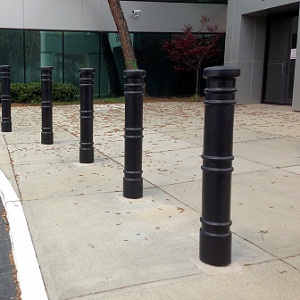
 Bollards are not only used for pedestrian safety but are also commonly used to protect buildings and property. Occasionally one will hear about a driver who lost control of their car before heading into a storefront or a restaurant. For building and property protection, steel and concrete bollards are again a common option. Again, more permanent solutions like concrete and steel bollards are typically seen in these circumstances.
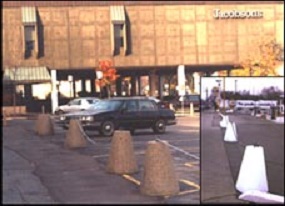
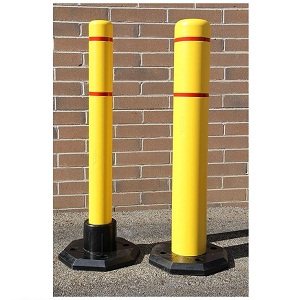 Removable bollards are perfect in areas where the safety measures needed may be more temporary. Situations like valet parking, parking lots, schools or loading areas where guidance is needed for traffic for short durations. Removable bollards may have good grip rubber bases or they may be ‘drop in’ bollards that can be anchored to the ground with a steel base as needed and removed later. Some removable bollards even have wheels attached to allow them to be moved into place easily.
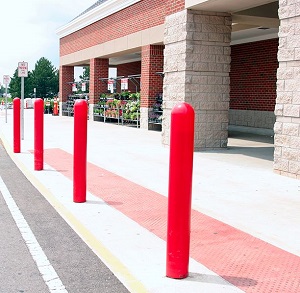
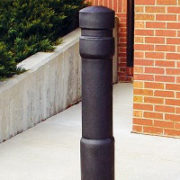
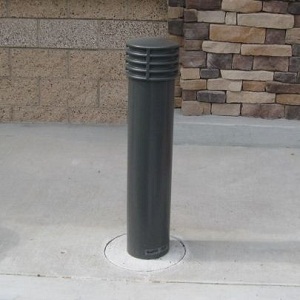 For bollards that have been in place for a long time and might be looking a little worn, bollard covers are a great option. Your steel bollards may still be doing a great job but they may not be looking their best anymore. Bollard covers can range from fancier, more decorative covers with lights and an architectural look to simpler bollard covers whose main purpose is just to look fresh and increase visibility. If your bollards are in good structural shape then bollard covers may be the perfect, cost effective solution. You can dramatically improve the appearance of an area without spending a lot of money while continuing to protect pedestrians and property.