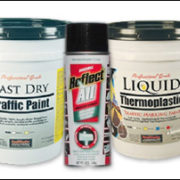

Believe it or not, there are high profit margins for contractors doing pavement and line-striping work. Not only are they paid well for their work, but the time and labor put in is not too extensive. Initial costs include the striping machine, however refilling supplies thereafter is not pricey, and generally jobs have $400 minimum requirements to cover overhead. A typical parking lot with 50 parking spaces, a couple handicap stalls and a few arrows can run for $1,500.
Learning how to stripe is not too difficult a task either. Start by re-striping existing stripes and you should get it down in no time. Note that cleaning or sweeping the pavement before marking it is needed to obtain the best results.
Furthermore, repeat business is common, especially in cold weather climates. Laws require proper striping as well as ADA compliant stalls, ensuring that demand is always high. There are always new lots in need of paint, as well as sports fields, roads, airports, sidewalks, curbs and road stencils.
Striping is a great way to earn extra cash. Your schedule can be flexible as long as you get the job done (some even stripe at night), and you’re your own boss! A few things to think about before getting into line striping include:

Titan PowrLiner™ 3500 Paint Striping Machine One Gun
When considering what machines and accessories will best suit your needs, make sure to check out Titan’s products, which can be found in our store. Titan is the industry leader, continuously bettering their products after being in the business for about 45 years. They manufacture a number of different stripers, all with unique features that make the process easier and more comfortable for you. Our most popular Titan product is the PowrLiner 3500, which uses the trademarked “PermaStroke Technology”, eliminating the need to replace packings, a piston or a clutch.
In order to make sure that you get the most out of your machines, make sure that you store, clean and maintain the products to the best of your ability. Some helpful tips include:
Finally, consider obtaining further resources and information on the best practices in this field. In order to optimize your time and money, it is critical to maintain and use the products the right way. If done, there is a lot of opportunity out there!
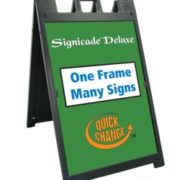
The new Quick-Change™ feature allows sign owners to slip their sign substrates into their frames without any tooling or maintenance whatsoever, giving them more versatility than ever before. It is simpler to use than its alternatives, it allows sign owners to print on multiple sides of their poster substrates, and it makes it easy to rotate between a number of different signs. If you’d like to get the most out of your sign frame by using it as many times as possible, the Quick-Change™ is worth the look.
To add the sign to the frame:
To remove the sign from the frame:
Watch how it’s done here:
Shop sign frames with the Quick-Change feature:
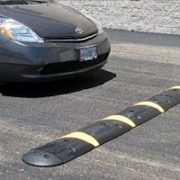
Rubber speed bumps may be regarded as superior to asphalt for a number of reasons: they’re easy to install and remove, they’re less damaging, and they’re cheaper. Although installing a rubber speed bump can be fairly easy, it’s important to do correctly to ensure it stays in place and lasts.
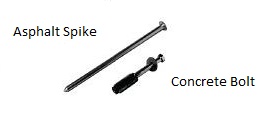
The first step is to make sure that you have all pieces and tools readily available for the installation. Different products have different specifications, so make sure that you have tools that will allow you to follow their specific guidelines. Besides the actual speed bump, your product may have come with either spikes (recommended for asphalt) or bolts and shields (recommended for concrete). Additionally, you will need a drill and hammer for installation.
Upon gathering the proper tools, follow these steps:
Note that it is recommended to remove rubber speed bumps before winter to prevent snow plows from destroying the product. Leave at least a few inches between speed bumps to allow for draining and possible expansion. Most rubber speed bumps are not designed for speeds exceeding 15 MPH.
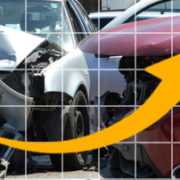
The National Safety Council reports that over 500 deaths and 60,000 injuries occur in parking lots and that number is on the rise. They cited the primary reason as the increase in mobile devices by both pedestrians and drivers.
According to a poll from the National Security Council*, respondents said they would do the following while driving their car through a parking lot:
View the CBS video below to see the full story.
Parking Lot Safety Tips
While the responsibility lies with individuals to be alert and take care for both their own lives and the lives of others, there may be some products that will help to keep your parking lot safer.
Create Your Own Sign with Custom Message:
Parking Lot Safety Reference Links:
http://www.safetyandhealthmagazine.com/articles/13340-avoid-parking-lot-hazards
http://www.hsc.wvu.edu/safety/general-safety/parking-lot-safety/
*http://www.nsc.org/Connect/NSCNewsReleases/Lists/Posts/Post.aspx?ID=164
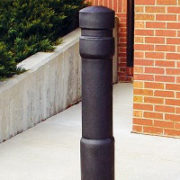
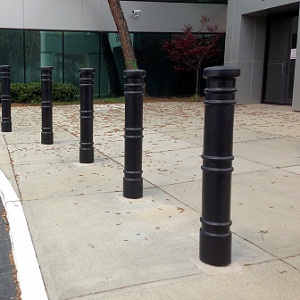 Bollard is not a familiar term for a lot of people. Everyone has seen them but might not have known what they were called. Of late, bollards have been in the news more as world events have put more focus on pedestrian safety. Articles in USA Today and the New York times have cited the difference bollards made in saving lives earlier this year in Time Square. In public areas where cars and pedestrians are in close proximity, steel and concrete bollards are often seen to separate cars from entering areas where pedestrians are. In the Times Square incident, the bollards had been added just the year before and their presence stopped a car that was headed the wrong way down a way one way street from doing even more damage then it might have.
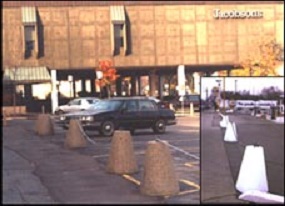 Bollards are not only used for pedestrian safety but are also commonly used to protect buildings and property. Occasionally one will hear about a driver who lost control of their car before heading into a storefront or a restaurant. For building and property protection, steel and concrete bollards are again a common option. Again, more permanent solutions like concrete and steel bollards are typically seen in these circumstances.
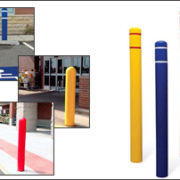
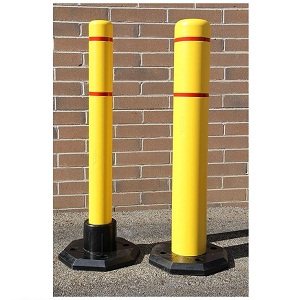 Removable bollards are perfect in areas where the safety measures needed may be more temporary. Situations like valet parking, parking lots, schools or loading areas where guidance is needed for traffic for short durations. Removable bollards may have good grip rubber bases or they may be ‘drop in’ bollards that can be anchored to the ground with a steel base as needed and removed later. Some removable bollards even have wheels attached to allow them to be moved into place easily.
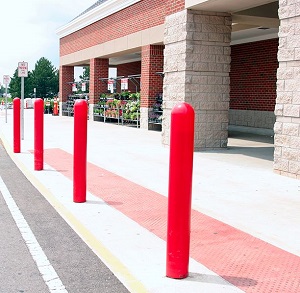
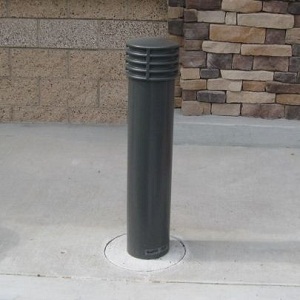 For bollards that have been in place for a long time and might be looking a little worn, bollard covers are a great option. Your steel bollards may still be doing a great job but they may not be looking their best anymore. Bollard covers can range from fancier, more decorative covers with lights and an architectural look to simpler bollard covers whose main purpose is just to look fresh and increase visibility. If your bollards are in good structural shape then bollard covers may be the perfect, cost effective solution. You can dramatically improve the appearance of an area without spending a lot of money while continuing to protect pedestrians and property.
For a limited time you can get EXTRA savings on quality traffic cones.
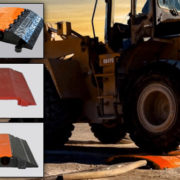
Wheel chocks are a critical tool to have when working on a vehicle that has the potential to roll. Usually, wheel chocks are used when the vehicle needs to be lifted at one end for maintenance purposes. Sometimes wheel chocks are used for larger vehicles parked on an incline, to keep them from rolling downhill.
Measure the height of the tire you need to secure using a tape measure. Most professionals suggest buying a wheel chock that is about one quarter the height of your tire. Once you have gotten the correct size wheel chock, you will want to be sure that the wheel chock fits snugly next to the tire. In some instances it is better to use more than one wheel chock. For instance, if you have a vehicle on an incline or a heavier vehicle you will typically want to use at least two wheel chocks and maybe even more (depending on the weight of the vehicle and the grade of the incline). Again, you will want to make sure each wheel chock is placed snugly up next to the tire. Larger vehicles like RVs and trucks will typically guide you to use 4 wheel chocks so that both the front and back end tires are secure. You can get more information by looking in your owner’s manual for the vehicle you plan to secure.
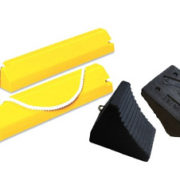
At Traffic Safety Warehouse we have a large supply of wheel chocks for all different types of needs. The majority of our wheel chocks are made of either tough recycled rubber or molded urethane. There is good reason for this. Rubber and urethane wheel chocks last longer and are more resistant to weather damage and abrasion. Urethane wheel chocks may also be more resistant to damage from oils and solvents.
Below are just a few examples of the many types of chocks we carry at Traffic Safety Warehouse.
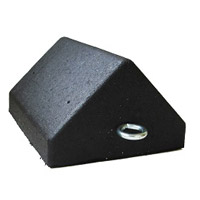
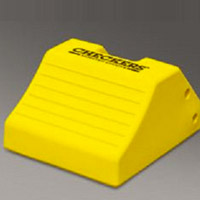
Popular Wheel Chocks
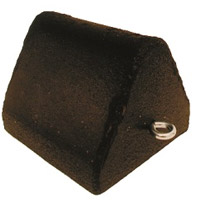
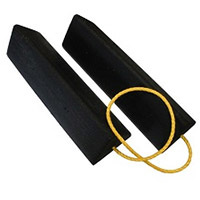
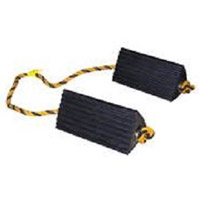
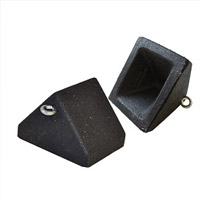
Aircraft Wheel Chocks:
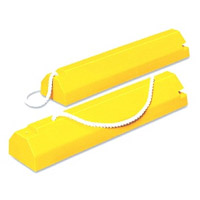
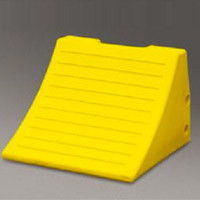
Heavy Equipment and Mining Wheel Chocks: